

- Hookaroon vs Pickaroon - August 8, 2022
- Best 24 Inch Chainsaw Options Guide: Which Is Right For You? - July 16, 2022
- Husqvarna 455 Rancher Review and Guide - May 2, 2022
A large, broadleaf tree reaching 30-40m high- Black Walnut (Juglans nigra) is named from its dark, heavily ridged bark.
Black walnuts are the top-ranked trees in America as it is the major nut trees and its wood has beauty and utility. Black walnut lumber is one of the most selected and enjoyed hardwoods for its fine grains, unique patterns, and bold dark color.
For any woodworking personnel, it is imperative to know the general tree identification keys. This is because only a small percentage of black walnut actually yield good lumber.
Good quality lumber is what defines your piece of work. So, while selecting black walnut lumber, seek out those with good woodworking properties like grains, color, and knots, etc. There are some of the few things you need to keep in mind before choosing your best walnut lumber. Let us check that out first.
Lumber Buying Guides- How to Choose One?
1. Dealing with the Knots
Though Black Walnuts are large big trees, their canopy starts at quite a lower height. Meaning, Walnut trees grow with a lot of branches on them, and all these branches equate to a corresponding number of knots.
Knots are the last thing any woodworker wants to deal with. So obviously, you are still going to want to look out for lumber that has as few knots as possible. For that, pick up better walnut lumber with at least 80% clear on the best face.
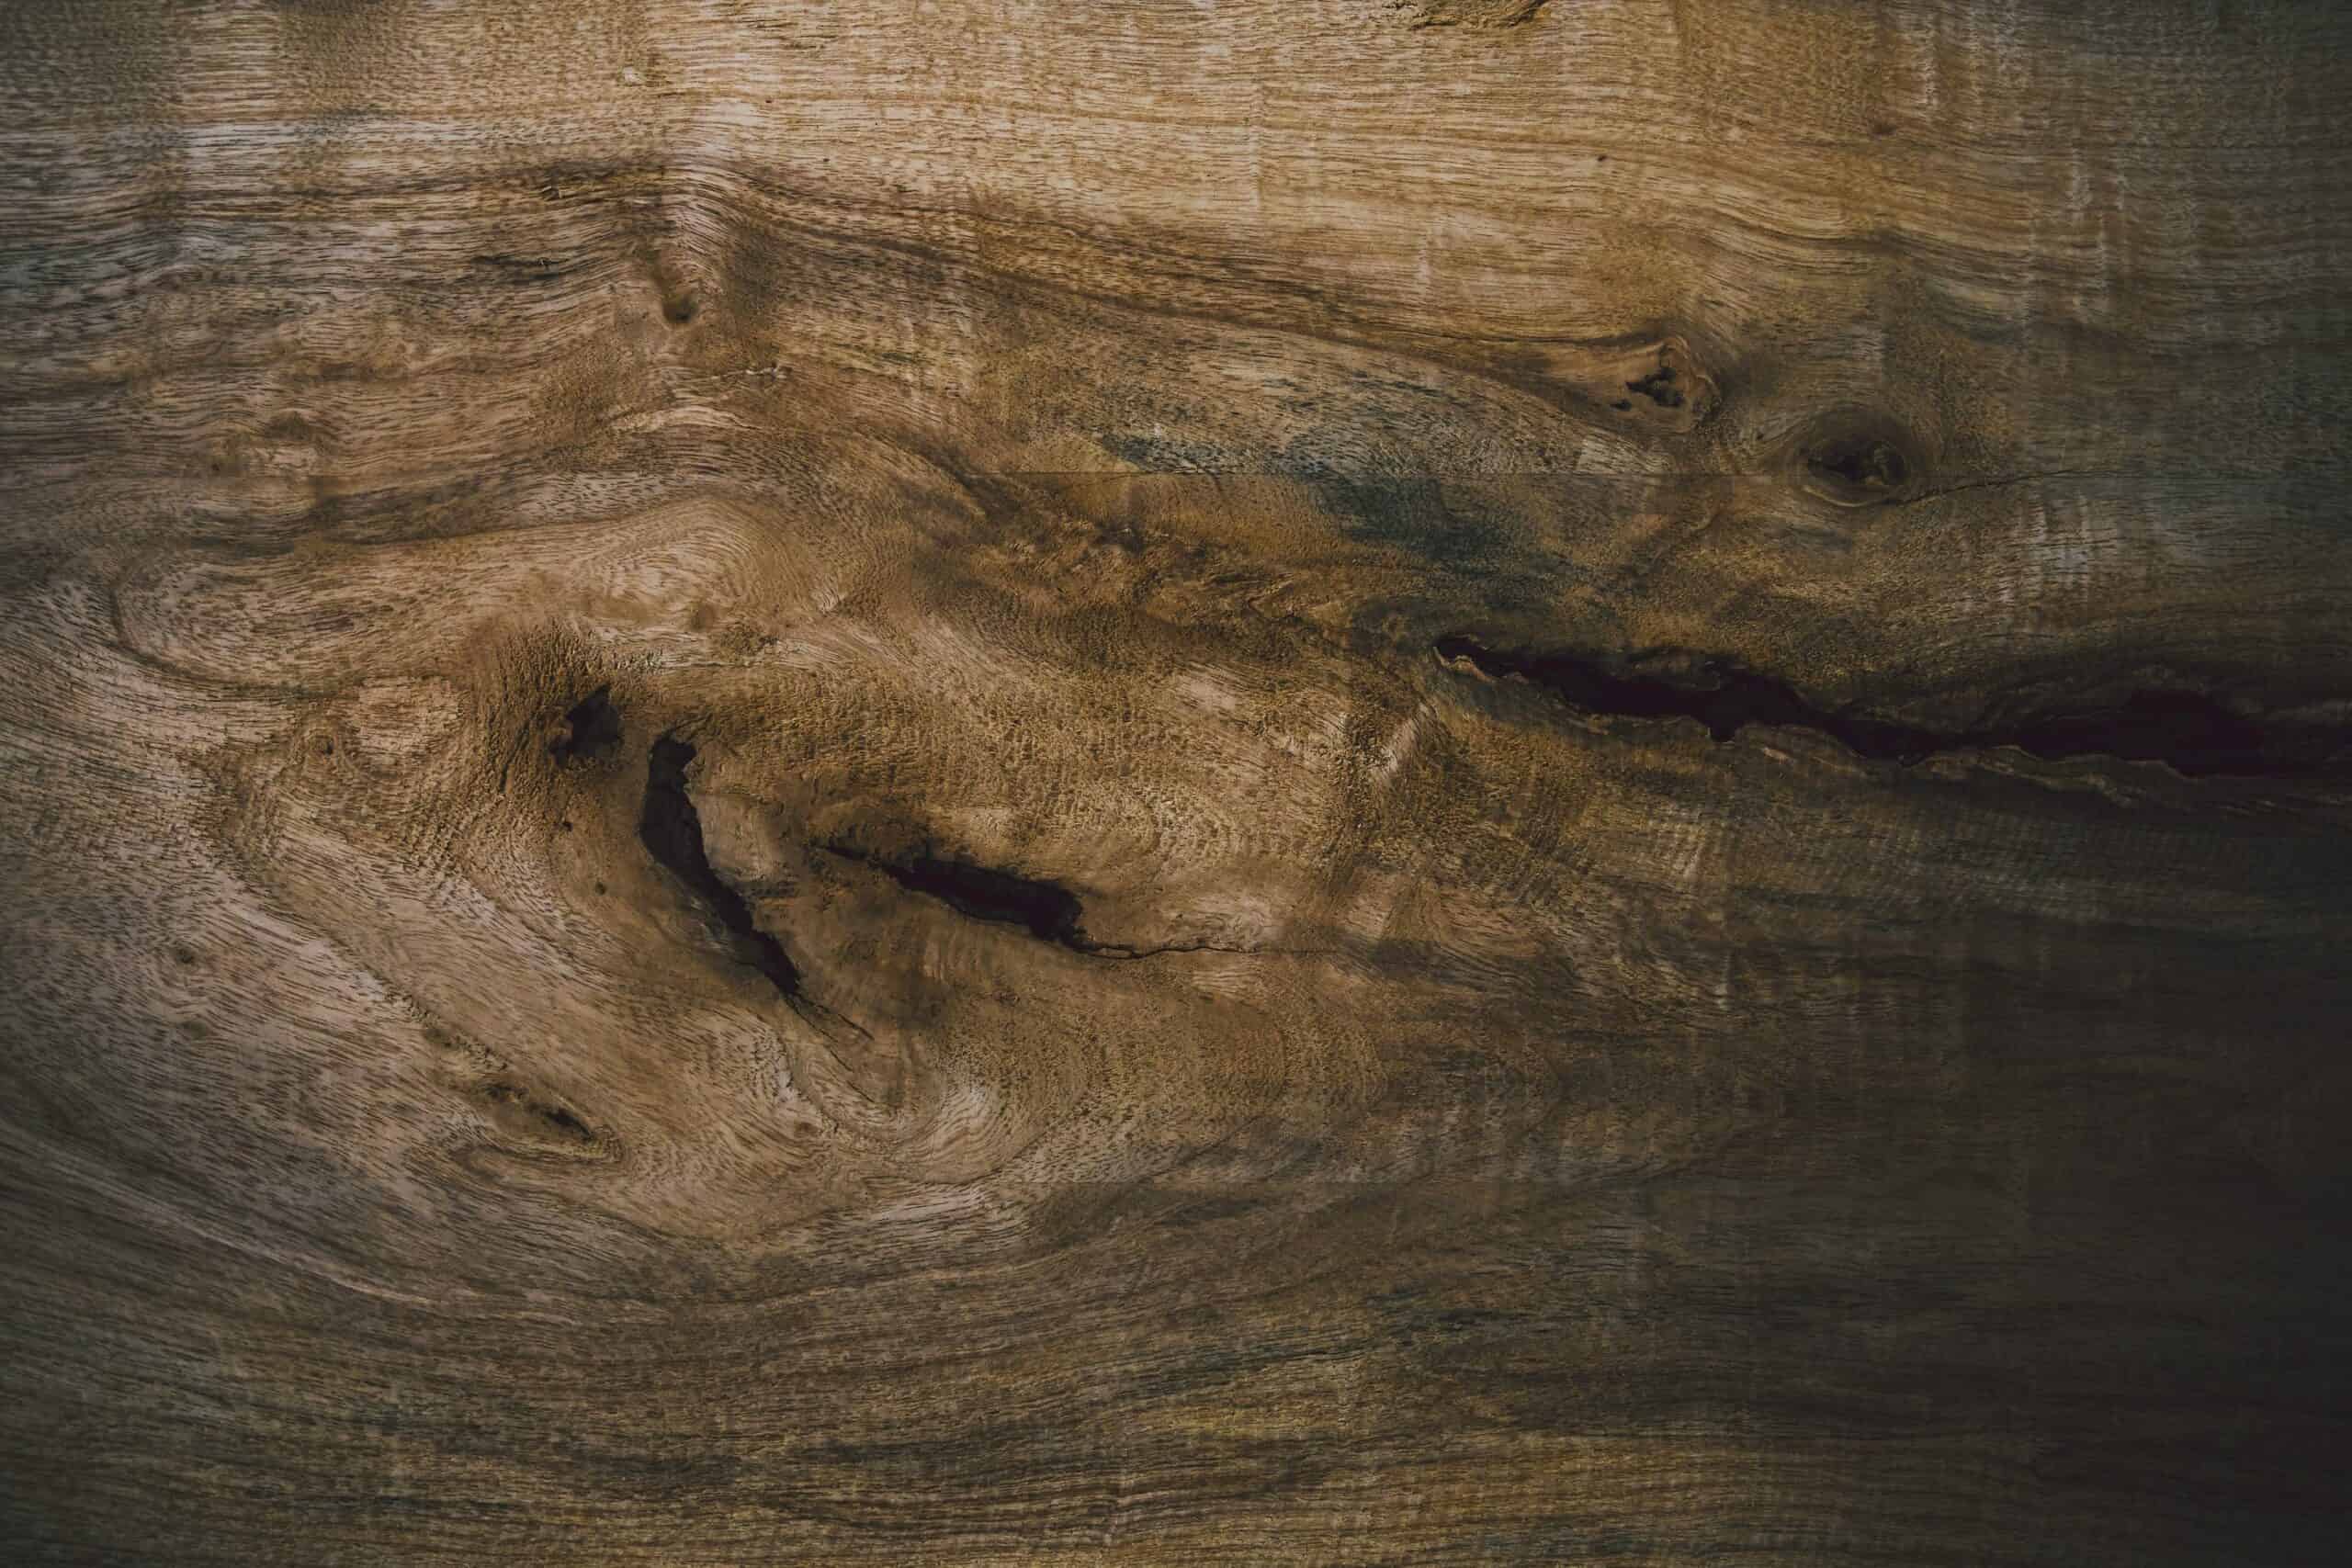
2. Grain Patterns of Black Walnut
Grain is one of the reasons a craftsman selects a certain type of wood. Woodgrain simply is the orientation of wood-cell fibers. Woodworkers give the term “fine-grained”, “coarse-grained” based on how these cells are arranged on bands/rays and the size and distribution of pores.
Black Walnut is a medium-grained wood. The cells, pores, and rays of this tree are medium. The grains of black walnut under good finish give ineffable highlights, changing with lights. In addition to that, terms like “open-grained” or “closed-grained” are used to make a decision- whether or not the surface requires the application of filler.
Looking at the patterns of grains of Black Walnut- you’ll see a straight grain in most of the cases. This indicates an advantage to work with as curvy grains sometimes require extra care in machining.
3. Color Issues
Color in any wood naturally originates from sapwood or heartwood. Sapwood is the outermost part while the heartwood is at the innermost region of any wood. The color of sapwood in Black walnut ranges from yellow and grey to nearly creamy white- as it carries tree nutrients. Unlikely, heartwood bears deep hues and sometimes may have lighter brown, greys, or reddish tints.
For the best face of the furniture, select lumber with a low portion of sapwood- it sometimes disturbs the beauty of dark, black, and bold walnut. To expose the beauty of Black Walnut, make sure you keep the sapwood bearing regions on the backside of the furniture- a minimum of 90% heartwood on the front side and a minimum of 60% heartwood on the backside.
Steaming in Walnut Woods
Steaming the walnut woods is a fascinating process. A dead pile of green lumber is placed on a steaming chamber and injected with steam.
Here, what’s happening is that the wood is going through a natural oxidizing process- darkening the woods. Steam is taking out all of the wood cells and pushing the water out towards the surface. Dark water at the surface now colors the sapwood.
After adequate steaming of lumber, sapwood changes its color into chocolate brown color- same as that of heartwood. Steaming reduces the contrast or color disparity that exists between heartwood and sapwood. Steamed Black Walnut lumber will give you a beautiful finish and luster than the unsteamed one.
Black Walnut Wood Uses

Walnut has always been the preferred wood from past decades. The shock-resistance, strength, and stability of black walnut made it perfect for gunstocks and were in high demand during the Civil War, and later during World War I and World War II.
The major use for black walnut today is in the furniture manufacture, veneer industry, cabinets, paneling, musical instruments, flooring, and sculpture.
Walnut weighs about 38 pounds per cubic foot at 12 percent moisture content- convenient to lift and turn. For this weight, it is relatively strong wood. Along with that, it holds a good shape after drying and seasoning- the reason walnut wood is hailed for.
Another impressive feature of black walnut wood is that it can be stained and satisfactorily glued. This is the best among hardwood in shaping and is easy to work with.
How to use Hand/Power Tools on Black Walnut?
Before moving on to “how to use”, let us first talk about “what to use”. The necessity of any kind of tool totally depends upon what kind of projects you are working on- might be plywood, furniture, or just a cutting board.
To begin with any kind of project, you just need three simple tools- a circular saw, a drill, and a sander. But, if you want to invest more and dive deeper, here are some of the game-changing woodworking tools:
Maximized for accuracy and capacity this DEWALT DWE7485 8-1/4 inch table saw includes on-board storage for blade guard assembly, non-through cut riving knife, anti-kickback pawls, blade change wrenches, miter gauge and push stick. 
These router bits are tipped with precisely machined YG8 tungsten carbide blades to allow for clean and accurate cuts on all types of wood with excellent resistance to heat.
The WEN Portable Band Saw maximizes portability without sacrificing power. This 10-amp motor provides users a cutting capacity of 5 inches wide and 5 inches deep, allowing you to take on workpieces of a variety of shapes and sizes. 
This block plane boasts a quick-release cam lock that makes iron removal easy, and there are finger grips machined into the sides, making single-handed use unbelievably easy. 
While working on walnut, make sure you are using a protective goggle, a dust mask, and have adequate ventilation- walnut woods have allergic properties. First, remove any kinds of tear-outs by taking shallow cuts.
While cross-cutting, use a backing board as a chip breaker to attach to the miter fence. There are somehow low chances of walnut to-burn in routing, but shallow passes eliminate tear-out.
As mentioned earlier, walnut is a straight-grained wood- requires as little filling as possible. Another commendable property of walnut is that it has really good adhesive performance. Care should be taken while joining with glue- let the glue squeeze out to a minimum and remove the skinned-over glue.
How to Apply Finishing Oil in Walnut Furniture?
Finishing oil gives a lustrous look and enhances the whole appearance of your furniture. Not only that, but the oil finish also protects the wood from pest infestation.
Among all modern oil finishes, danish oil is the most common one. It is a synthetic oil with dark pigments. Linseed oil is the most common natural oil in practice. It is rich and glossy but, many applications are required for a great finish.
Remember, the wood you choose to be finished with oil must be evenly sanded so that it is smooth. Using a clean cloth, apply the danish oil in a circular or figure-eight motion.
Application of the oil continues till the wood absorbs the oil. Once the wood stops absorbing the oil, cease the process. Finally, after the full application, remove/wipe the furniture with a clean cloth- remove the excess oil. Leave no oil on the surface, or in the case of linseed oil, only a very thin film of oil remains on the surface.
Recoating is done after the first coat. Linseed oil requires more recoating than danish or tung oil. Like above, apply an additional coat of oil with a clean piece of cloth- remove the excess. And you’re done.
How to Apply Black Walnut Veneer?
Black Walnut veneer is a thin sheet of natural wood used to beautify irregular/ uneven surfaces. Market products of walnut veneer include edge banding, flexible sheets, and cabinet refacing kits. All of these are available in multiple cuts, sizes, and backer options.
Listed below are some tips and tricks that you might find helpful while applying the veneer.
Preparing the surfaces properly:
Do not apply veneer directly to the substrate, make sure you do a quick scuff sanding with 60 or 80 grit sandpaper.
Choosing the right glue
Most woodworkers recommend Better bond X-pressTM veneer glue- right glue for applying veneer. Contact cement is another type of glue, but sadly it works best either paperback or two-ply veneers.
There are times when you need veneer repairing. At that time, purchase those veneer glue that has better bond strength, moisture resistance, non-toxic.

Using glue roller
Applying the glue to the substrate material is the rule of thumb. Use a simple foam rubber glue roller to evenly distribute the veneer glue on the substrate surface.
Vacuum pressing the panel
Vacuum pressing is the best option for clamping the veneer. The principle of vacuum pressing is evenly distributing the pressure across the entire surface.
How to Apply Walnut Woodgrain Filler?

Woodgrain filler emphasizes the grain pattern by putting little contrast in the pores. Here’s how to apply it:
- Oil-based grain fillers are a dull gray or tan color thus need to be tinted with an oil stain. Darker oil stain increases the contrast of the pores.
- Mix 2 parts of fillers with 1 part of the stain.
- Using the brush or a cotton rag, apply the grain filler on pores and leave it for 10 to 15 minutes.
- Scrape the filler off of the surface or gently wipe the leftover residue with a towel.
- Leave the filler to dry for about 8 hours and sand if necessary.
- Since one coat of the filler does not fill the filler cent percent, do another application and then apply your topcoat.
FAQs
Question: Why does the color of walnut woods change over time?
Answer: Exposure of walnut wood to sunlight for a longer period leads to natural oxidation. This ultimately results in to change in the color of the wood.
Question: What is the availability/price of Black Walnut?
Answer: Black walnut/ American Black walnut is predominantly available in the Northern American region. Since the woods are this rare, walnut woods are more expensive than other hardwoods. Another reason for a high price is its low supply.
Question: Is Black walnut good outdoor furniture?
Answer: Black walnut is a photosensitive wood, it easily fades its color when exposed to sunlight or kept outdoors. In short, the beauty gets deteriorated.
Question: Is there any way to keeping walnut wood close in appearance to raw color?
Answer: Using the oil stain darkens your woods- instead, try a water-based finish.
Conclusion
Doesn’t matter if you are really into woods or just an observer- beautiful black walnut will definitely amaze you. Not only furniture but many people spare their time carving the walnut woods. Because it has an allergic effect on some people, furniture is in high demand rather than sculpture. This article can help and guide you to start your first black walnut woodworking project- from selecting the lumber to making a DIY table.